Project Wizard
The Project Wizard guides you step-by-step in creating a new project.
Specify Project Name and Location
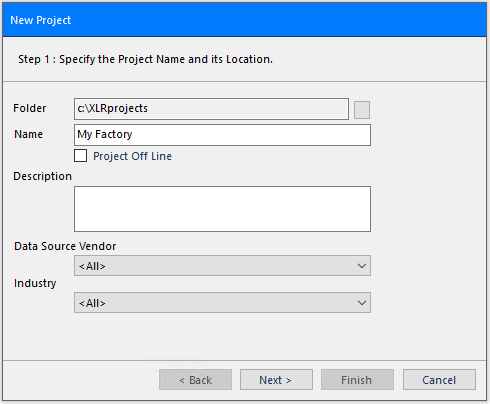
Specify the Folder where the project will be located then enter the Project Name and Description.
If desired, specify the Data Source Vendor and Industry settings for the project. If specified, these are used to restrict the items available when defining connectors or when defining templates using the template library.
Configure Connectors
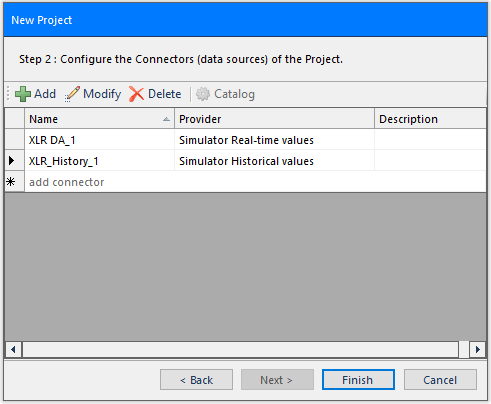
Configure data connector(s) to the data sources used in the project.
For the Distributed edition, after creating the project you are prompted to update the web portal. This requires administrator rights. If you cannot provide those rights, you may not be able to view reports in the web portal.
Project Settings
Once the project is created, all the settings for the project can be accessed by selecting File, Settings and then the group of settings you wish to modify.
User Sign In/Out
If user security is enabled for the project, click Sign In in the Project Explorer title bar to sign in with a valid user account. Once signed in, the user name appears in the title bar. Click the user name to sign out.
File Archive
The File Archive is used to restore project files to earlier iterations when security is enabled. This is accessible by selecting File, File Archive.