Data Entry Forms
Overview
Data Entry Forms are used to manage manual data entry such as operator rounds, laboratory results and process readings. If paper forms are currently being used, they can be easily transformed to an electronic form and have their content stored to a central database and not to a filing cabinet.
By storing information electronically, users can easily access a historical knowledge base in order to make more informed decisions to keep the plant running safely and efficiently.
The Data Entry Form interface looks similar to the following:
 |
In the top left are the Form Templates available to the active user. Selecting a form refreshes the Input Panel section which is used to determine the form displayed. The Input Panel is configured during the design of the form and can offer input methods such as a date calendar or a list retrieved by a database query.
The user saves entries, or edits, to a database by pressing the Store button. At any time, any user with the right privilege can Lock form data to prevent any changes to the data.
Implementation
Data Entry Forms can start on a standalone workstation and grow over time to a team of workstations and tablet devices (Windows), with each client submitting its own completed forms. Since no knowledge of SQL or software programming is required, it can be implemented easily by anyone with a basic understanding of a workbook like those used in Microsoft Excel.
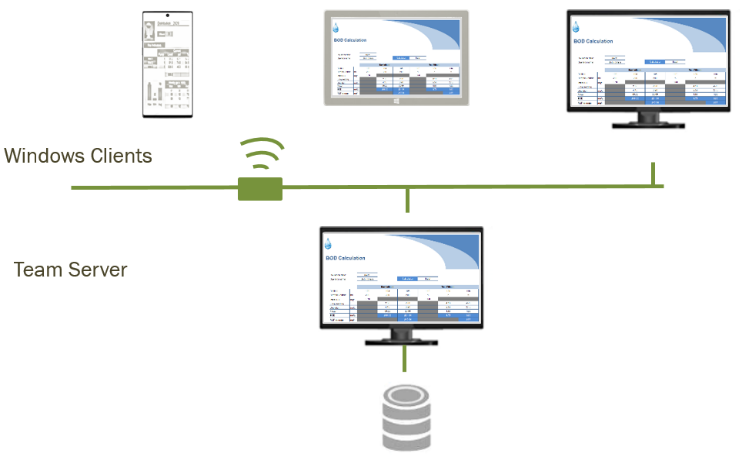 |
Once the purpose of the form has been decided, the steps required to implement Data Entry Forms are:
Define a Data Entry Connector.
Define a Database Table to store the data entered via the form.
Design a Data Entry Template and any Form Variables.
Deploy the Data Entry Template.
These steps are explained in later sections of this document.
The data collected in the database can be used in reports with a History Data Group or a Database Data Group. It is suggested that the database group is only used if the history group does not provide the results you are requiring.
Workbook Primer
This section of the document reviews workbook concepts that are relevant to data entry. An understanding of workbook technology facilitates more effective and user-friendly forms.
Cell Protection
By default, all the cells are locked which prevents any changes when they are used. During the design of the form cells can be Unlocked to allow data entry by the user. To unlock a cell, use the Format drop-down list on the Design tab in the Template Studio.
 |
From Excel, this is accessed by right clicking a cell or range, selecting Format Cells then the Protection tab.
If the form is tabular in nature, only the cells representing the first entry need to be unlocked. For example, in the image below, only the first row of blue-background cells need to be unlocked.
Note, this option has no affect on the template itself, it is only applied in the Data Entry Forms application to only allow data entry in specific cells.
Formulas
Workbooks provide an extensive list of cell formulas. For example:
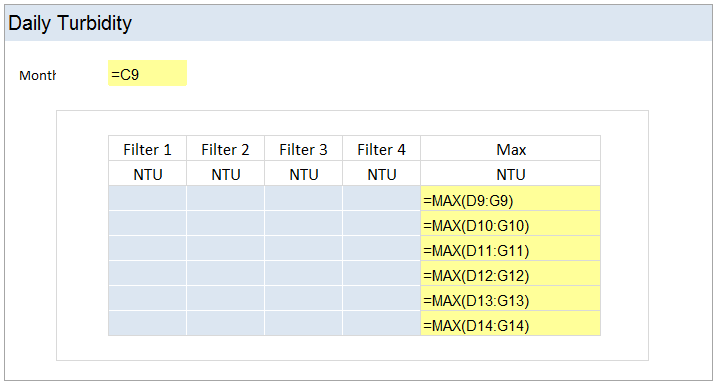 |
In this example, the user enters values in the blue cell and the formula update the yellow (which are not shown in practice). When a cell contains a formula, it is automatically locked so that the user cannot change its value.
A formula can be manually entered into the cell or can be constructed by clicking the fx button in the formula bar both in the Template Studio and Excel.
Data Validation
Data Validation is used to limit the type of data or values that a user can enter into a cell on the form. This feature is useful to maintain the integrity of the data for later analysis. Custom messages are supported to assist the user.
Select a cell and then choose Data Validation from the Design tab of the Template Studio or the Data tab of Excel.
 |
Select the Type and enter the appropriate settings. In the above the Type is set to List and the list items are determined from the Input Source =$K$4:$K$11. For simple lists, this could be entered directly, separated by commas e.g., Yes, No.
If the cell cannot be left empty then uncheck Ignore Blank.
Criteria Tab
Any value
No validation is performed (default).
Whole Number
Whole number satisfying the criteria.
Decimal
Decimal value satisfying the criteria.
List
Values from a predefined list or a list from a range of cells.
Date
Dates in a specified range.
Time
Times in a specified range.
Text Length
Text of a certain length.
Custom
Formula evaluating to True/False (used for alerts).
Input Message Tab
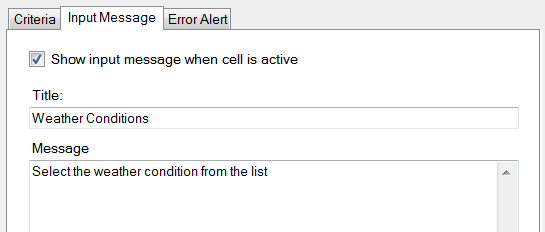 |
When the cell is active this message will appear to the user.
Error Alert Tab
 |
In the event of an invalid value, this message will appear.
Form Examples
Before any configuration is performed, review the form requirement. This usually involves understanding the parameters to display the form, the information entered by the user and the filters used when the form is stored.
XLReporter provides two styles of forms: By Column and By Table. The By Column style is used with forms that operate on a single record in the database where as the By Table operates on multiple records.
By Column
This style of form operates on a single record which is selected by either Date or Custom settings. In the following a few examples are presented of this style of form.
Operator Round (Date)
Forms can be used every day, week, or month to capture readings.
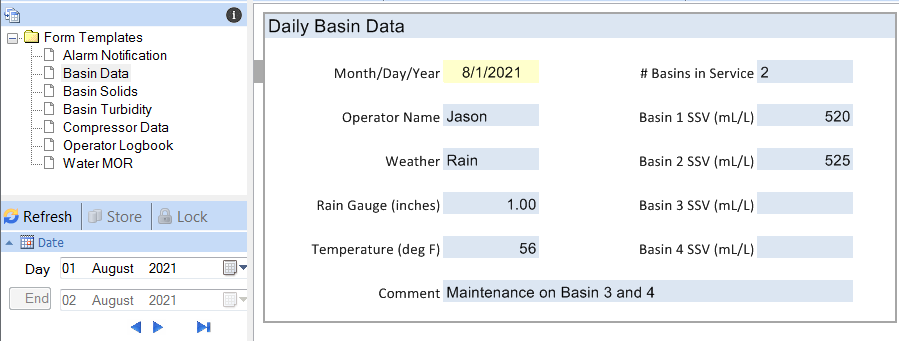 |
In the example, the desired day is selected in the Input Panel. The form is filled out by the operator while performing their rounds and Stores the edits (which can be done locally or across the network). Pick lists and value limits are used to contain the data entry.
BOD Calculations (Date)
Forms can be used to store the results from calculations.
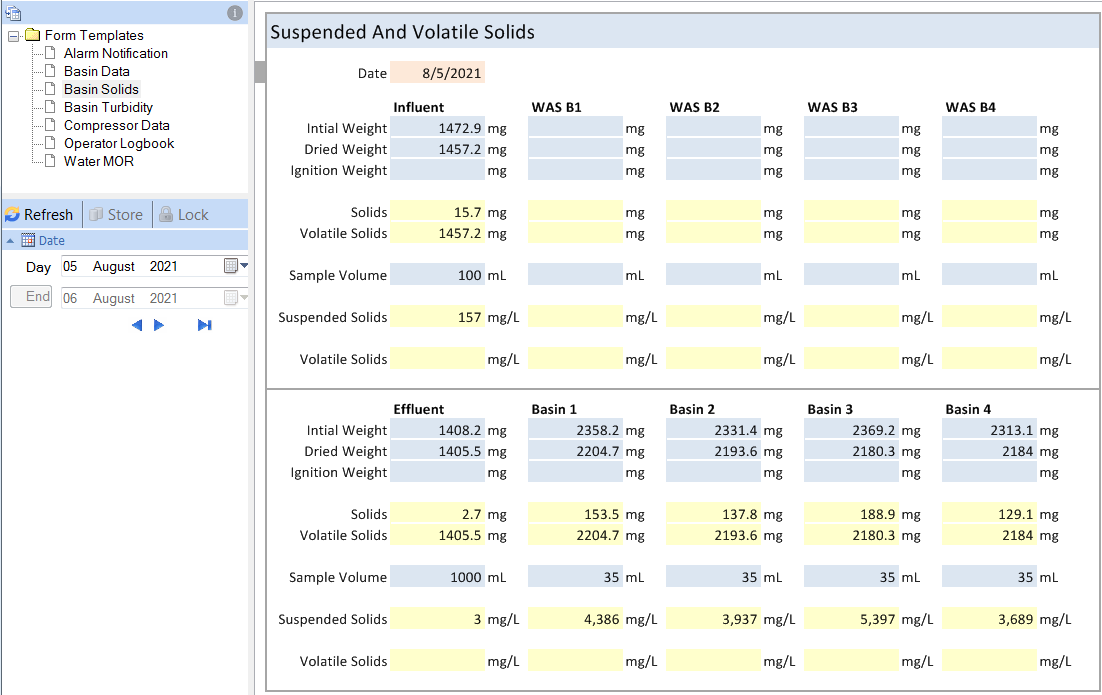 |
When laboratory results become available, the time period is selected in the Input Panel and the results are entered. Cell colors (blue) guide the user to the input fields. The form contains calculations (yellow) which depend on the values entered. When complete, the operator Stores the edits (which can be done locally or across the network).
Alarm Notification (Custom)
Forms can be created by the occurrence of process events. In practice, the detection of the events is either by the XLReporter scheduler or by a third-party software interface.
In this example, the alarms database is monitored periodically for a critical alarm. When a critical alarm is detected, a form is produced and automatically populated with the date and tag of the alarm.
 |
Incomplete forms are listed in the Input Panel. The user selects an entry, adds comments and Stores the edits (which can be done locally or across the network). The Store operation writes the form content back to the database. When the form is complete, it is removed from the list by clicking the Lock pushbutton.
Equipment Maintenance (Custom)
Forms can be created by the occurrence of process events. In practice, the detection of the events is either by the XLReporter scheduler or by a third-party software interface.
In this example, the runtime of the compressors is monitored periodically for the exceedance of a specified condition e.g., runtime hours. When the condition is met, a maintenance form is produced with the runtime hours automatically populated.
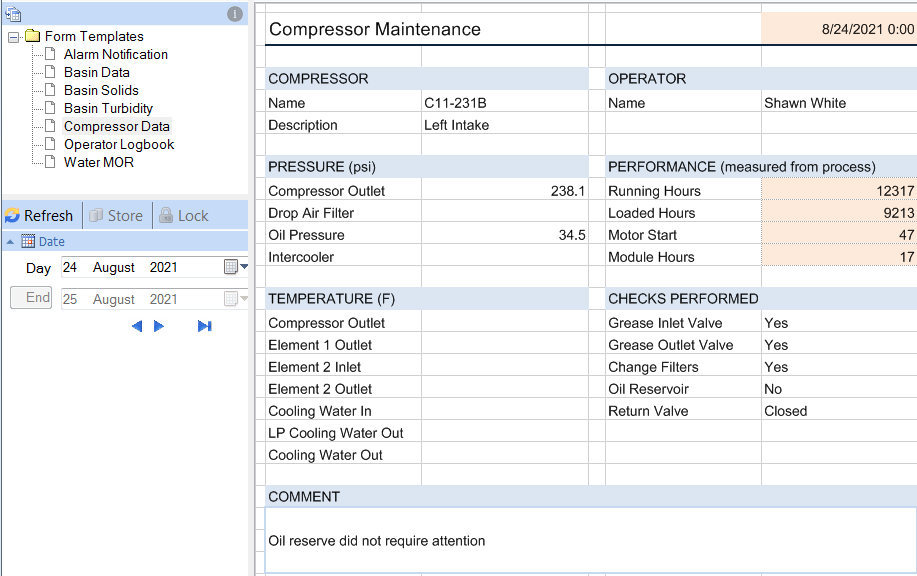 |
Like the previous example, the form is selected from a list in the Input Panel. The operator selects the date, enters the checks performed, adds notes and records other current running conditions.
Knowledge Base (Custom)
This example represents a form based on custom setting such as a Ticket ID.
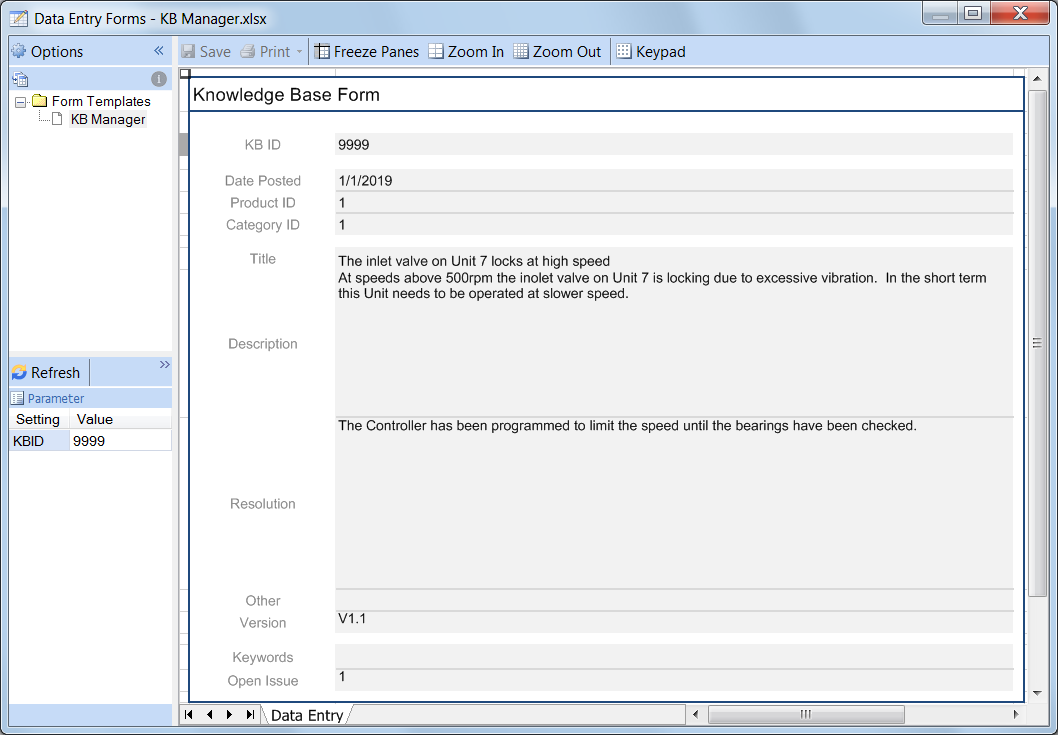 |
The user selects a form by entering an ID. If a form with the ID had been previously created, it is opened for editing otherwise a new form is created using the ID specified.
By Table
With the By Column form style, the user operates on a single record. The By Table style operates on multiple records which are selected by either by Date or Custom settings. In the following a few examples are presented of this style of form.
Turbidity (Date)
In this example, a daily form is filled out every 4 hours with the turbidity readings.
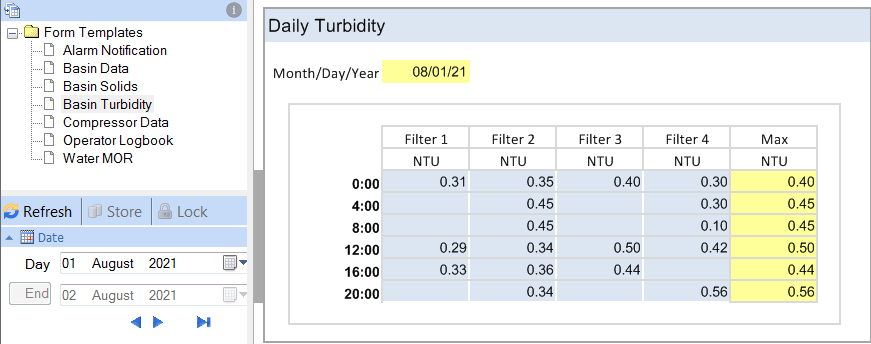 |
The form is filled out incrementally over the day. The Max column is read only and uses workbook formula to derive their values.
Monthly Operating Report (Date)
In this example, a monthly form is updated every day. The values entered can be manual or a combination of manual data and values automatically retrieved from the process. When process data is used, it is added to the form automatically, with the option to edit anomalies.
 |
The input to the form uses data validation to limit the values to a certain range. On completion of the report, it can be saved as an eDMR XML file and submitted to the States web site.
Operator Logbook (Custom)
When Custom settings are used, highly customizable forms can be designed.
In this example, an operator logbook allows shift/daily tickets to be created when condition occur in the process that the operator needs to report. These tickets can be shared from shift-to-shift, day-to-day.
 |
In the above example, all the tickets that are “open” are displayed for the date specified. Since there are numerous data items in a ticket they have been arranged in multiple rows and also grouped by “report” items and “action” items.
When a ticket is opened, the user enters the information and Stores to the database which stores the edits to the database and creates a new blank ticket. When the actions taken for remedy or comment are added, they also become part of the ticket.
Record Indicator
The A column of a form is used by XLReporter as a record indicator.
No color
The row is empty; no data has been entered
Grey
The record is saved in the database
Green
The entry is edited but not saved to the database
Red
The entry is invalid and cannot be saved to the data
Yellow
The form is locked in the database
Dark Yellow
The record is locked in the database
Right-click on the indicator to display a context menu to Cancel an edit, Delete a record or Lock a record.