Connector
The connector defines all the information XLReporter needs in order to retrieve the data from the provider’s alarm database and how to interpret the settings of each alarm record to produce the alarm metrics.
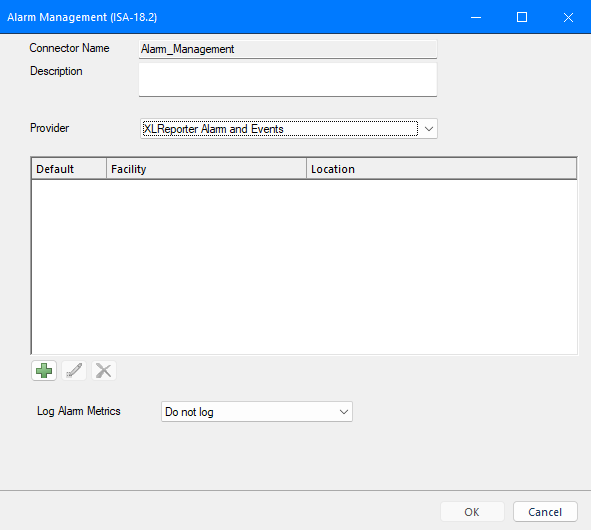 |
Note that only one Alarm Management connector can be defined in a project. However, within the connector, multiple facilities, each with their own database, can be defined within this connector as long as those facilities all use the same alarm provider.
Provider
The Provider setting contains a list of vendor specific alarm databases. The Provider selection supplies default settings for the connector which can be changed if needed.
Log Alarm Metrics
As part of the connector, the comprehensive Alarm Report template can be scheduled to generate on a daily, weekly and/or monthly basis. The key metrics (KPIs) in this report can be logged to a database so that those KPIs can be used in other reports. The following options are available:
Do not log
KPIs are not logged from the scheduled Alarm Report.
Internal Database
An internal database is set up to log KPIs. When this connector is saved an additional connector is created for the internal database which can be used to report the alarm KPIs in other reports.
External Database
An external database is set up to log KPIs. When selected, a browse button is provided to define database connectivity.
When this connector is saved an additional connector is created for the internal database which can be used to report the alarm KPIs in other reports.
Existing Connector
KPIs are logged to the database defined in an existing Database History Wide connector previously defined in the project.
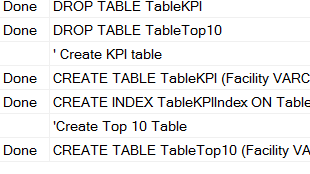
If any logging option is selected, when the connector is saved, the Update Database window appears showing that new tables have been added to the database to receive the KPI/alarm information.
 |
Defining a Facility
A new facility is defined by clicking the  button. Once a facility is defined, it appears in the grid. To modify a facility, click the
  button to access and change settings.
General Tab
 |
Database Connection
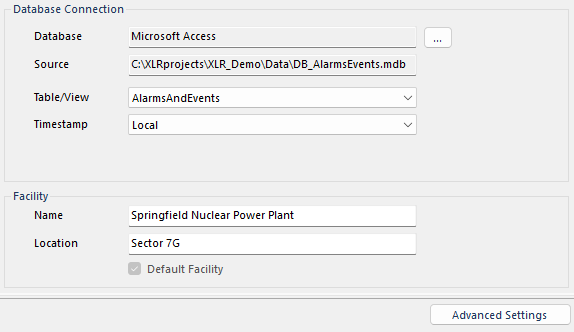
These settings define how to connect to the alarm database. Until these settings are defined, the General tab is the only tab available.
Source
Browse button provided to define connection to database source. This varies depending on the provider selected.
Table/View
Once connection established, the table or view in the database where the alarm data is logged.
Timestamp
This defines whether the timestamp of each record is logged in the local time zone or in the UTC time zone. Note that even if the timestamps are in UTC, users specify local time and records are returned in local time.
Facility
These settings define the facility information.
Name
The name of the facility. This can be displayed as metadata in a report.
Location
The location of the facility. This can be displayed as metadata in a report.
Default Facility
This indicates that this facility for the connector. This means that if no specific facility is specified, this is the facility that is used to produce the alarm metrics.
Filters Tab
The settings under this tab define a set of filters that can be selected by the user when generating reports with alarm metrics on demand. They can also be configured as part of the alarm metric itself, so it is calculated based on the filter settings. The first row of each filter type is set for All which basically turns off the filter so all alarm records are considered. This row cannot be modified or deleted. Filters are added by clicking . Filters are modified by clicking . Filters are deleted by clicking  .
.
Position
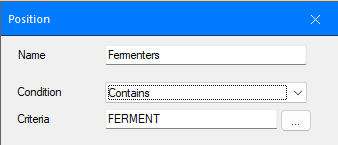 |
The Position filter defines a set of operator positions to filter alarm records on. This filter is used against the column defined for Area in the alarm table/view. The settings are:
Name
The filter name presented to the user to select.
Condition
The filter condition. A browse button is provided that gives a list of distinct Area values that can be selected for the filter.
Textual filter conditions are:
Starts With
Any row where the Area column starts with the Criteria specified are considered in the alarm metric calculations.
Ends With
Any row where the Area column ends with the Criteria specified are considered in the alarm metric calculations.
Contains
Any row where the Area column contains the Criteria specified are considered in the alarm metric calculations.
Does Not Contain
Any row where the Area column does not contain the Criteria specified are considered in the alarm metric calculations.
List filter conditions provide a list box where multiple values can be specified. The list conditions are:
In
Any row where the Area column that matches the Criteria specified are considered in the alarm metric calculations.
Not In
Any row where the Area column that does not match the Criteria specified are considered in the alarm metric calculations.
Criteria
The criteria value(s) for the Condition specified.
For a text based Condition, this is a text control that can either be manually entered or the browse button can be used to select an existing value in the Area column. That selection can then be edited as needed.
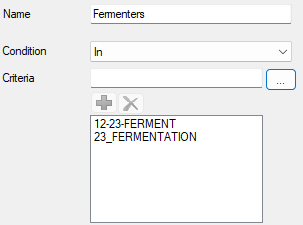
For a list-based Condition, this is a list control where multiple items can be added either by manually entering in the text control and clicking
. Alternatively, click the browse button and select one or more values. On OK, all selected items are added to the list.
Module
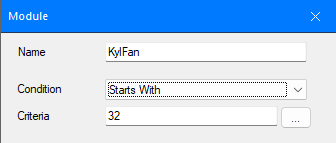 |
The Module filter defines a set of modules (tag names) to filter alarm records on. This filter is used against the column defined for Module (Tag Name) in the alarm table/view. The settings are:
Name
The filter name presented to the user to select.
Condition
The filter condition. A browse button is provided that gives a list of distinct Module values that can be selected for the filter.Textual filter conditions are:
Starts With
Any row where the Module column starts with the Criteria specified are considered in the alarm metric calculations.
Ends With
Any row where the Module column ends with the Criteria specified are considered in the alarm metric calculations.
Contains
Any row where the Module column contains the Criteria specified are considered in the alarm metric calculations.
Does Not Contain
Any row where the Module column does not contain the Criteria specified are considered in the alarm metric calculations.
List filter conditions provide a list box where multiple values can be specified. The list conditions are:
In
Any row where the Module column that matches the Criteria specified are considered in the alarm metric calculations.
Not In
Any row where the Module column that does not match the Criteria specified are considered in the alarm metric calculations.
Criteria
The criteria value(s) for the Condition specified.
For a text-based Condition, this is a text control that can either be manually entered or the browse button can be used to select an existing value in the Module column. That selection can then be edited as needed.
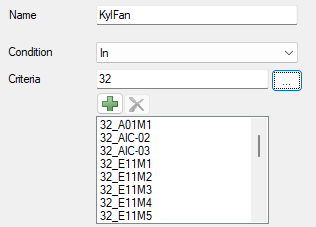
For a list-based Condition, this is a list control where multiple items can be added either by manually entering in the text control and clicking
. Alternatively, click the browse button and select one or more values. On OK, all selected items are added to the list.
Attribute
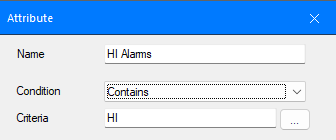 |
The Attribute filter defines a set of attributes to filter alarm records on. This filter is used against the column defined for Attribute (e.g., HI_ALM) in the alarm table/view. The settings are:
Name
The filter name presented to the user to select.
Condition
The filter condition. A browse button is provided that gives a list of distinct Attribute values that can be selected for the filter.Textual filter conditions are:
Starts With
Any row where the Attribute column starts with the Criteria specified are considered in the alarm metric calculations.
Ends With
Any row where the Attribute column ends with the Criteria specified are considered in the alarm metric calculations.
Contains
Any row where the Attribute column contains the Criteria specified are considered in the alarm metric calculations.
Does Not Contain
Any row where the Attribute column does not contain the Criteria specified are considered in the alarm metric calculations.
List filter conditions provide a list box where multiple values can be specified. The list conditions are:
In
Any row where the Attribute column that matches the Criteria specified are considered in the alarm metric calculations.
Not In
Any row where the Attribute column that does not match the Criteria specified are considered in the alarm metric calculations.
Criteria
The criteria value(s) for the Condition specified.
For a text-based Condition, this is a text control that can either be manually entered or the browse button can be used to select an existing value in the Attribute column. That selection can then be edited as needed.
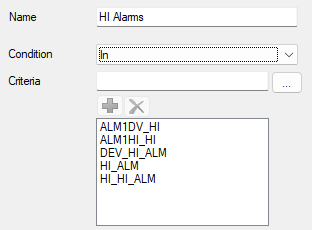
For a list-based Condition, this is a list control where multiple items can be added either by manually entering in the text control and clicking
. Alternatively, click the browse button and select one or more values. On OK, all selected items are added to the list.
Cycle
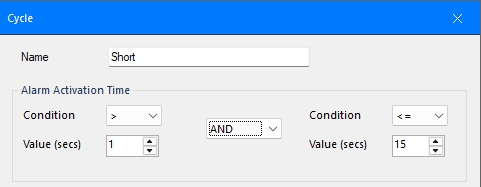 |
The Cycle filter defines a set of custom durations to filter alarms by, based on how long the alarm was active. For example, a Cycle filter can be defined to show only alarms with a very short duration. Conversely a Cycle filter can be configured to only consider alarms that are active for at least 1 minute.
Durations can be defined as either > a number of seconds or> an number of seconds AND <= a number of seconds.
Defining Level Conditions
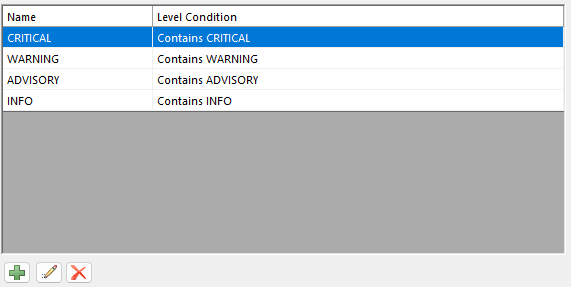 |
Level Conditions categorize the severity of alarms in the system. By default, there are 4 levels defined: CRITCAL, WARNING, ADVISORY and INFO. For each defined Level a Condition is defined for categorization. This is based on the Level column defined in the alarm table/view. This can be either a numeric or textual value. These are defaulted based on the specific Provider selected but can be added or modified by using the controls available.
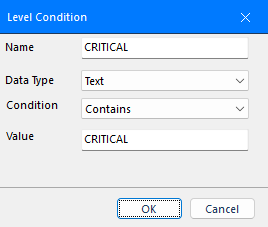 |
The following settings are available when defining a Level Condition:
Name
The Level name.
Data Type
The Level column data type. This can be Text or Number.
Condition
The Level Condition. For Data Type Text this is:
=
Contains
For Data Type Number this is:
=
Between
Value
The Level Condition value.
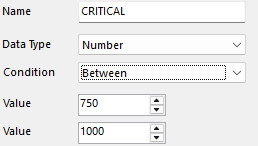
For Condition Between, two values must be specified
Defining a Schedule
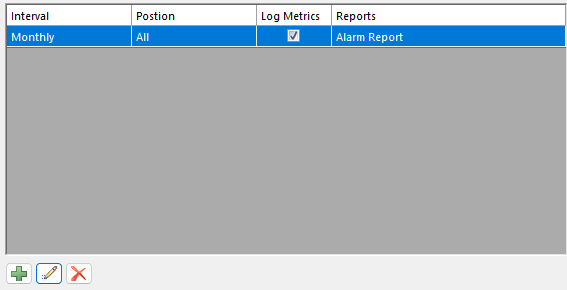 |
When this connector is saved, three preconfigured templates are added to the project: Alarm Report, Alarm Analysis, and Alarm Flood. These are described in detail in the Preconfigured Templates section below.
Any or all of these templates can be scheduled to generate reports on a daily, weekly and/or monthly basis.
Schedules are added by clicking . Filters are modified by clicking . Filters are deleted by clicking .
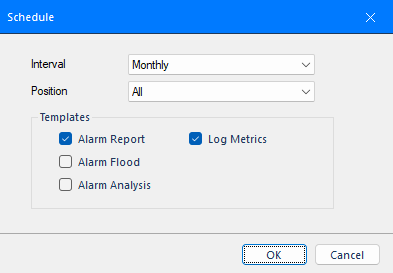 |
When defining a schedule, the following settings are available:
Interval
The time interval for generating reports from the selected Templates. This can be Daily, Weekly or Monthly.
Position
The Operator Position filter to apply to the metrics in the selected Templates. The list reflects the Position filters defined under the Filters tab.
Templates
Which templates to generate reports from.
If the Alarm Report template is checked and Log Alarm Metrics is set for the connector, check Log Metrics to have the metrics from this report logged to the database.
Advanced Settings
The Advanced Settings are a group of settings that are typically defaulted correctly based on the Provider selected but can be customized if needed.
Columns
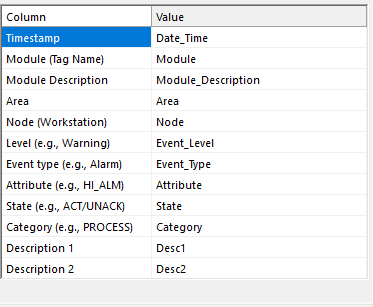 |
This tab displays a list of the Columns the Alarm Management module requires and the corresponding column in the Table/View in the Alarm database connected to. For each Value, a drop-down list is provided to select the existing column.
Server Filter/Order
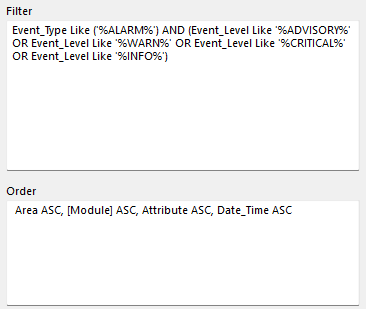 |
This tab displays the Filter and Order that are submitted as part of the query to the alarms table/view. These settings adhere to SQL syntax so be very careful if making any edits.
Settings
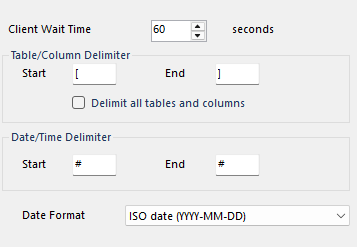 |
This tab shows specific settings for the database selected.