Electronic Signatures (eSignatures)
Electronic signatures (eSignatures) are a mechanism that allows Users to review and accept completed reports by applying an electronic signature to report documents.
Enable Electronic Signatures
From the Project Explorer under the Security section select Settings.
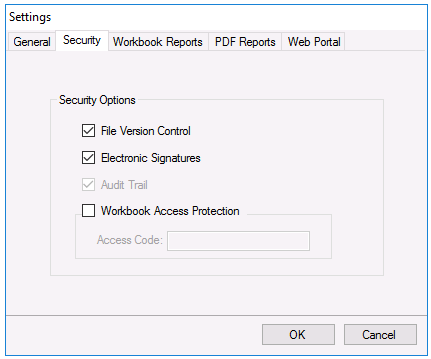 |
Check Electronic Signatures to enable the feature.
This feature requires the Audit Trail connector to be defined (see Audit Trail). If the connector is not part of the project, then this is indicated on the display.
Add eSignature Credentials to a User
To apply an eSignature, users need to be given the authorization in the User Account settings. From the Project Explorer under the Security settings select User Accounts.
Open the settings of the User.
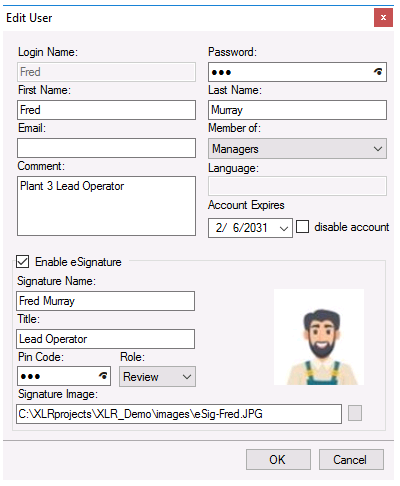 |
Each user belongs to a user group. If the group permits electronic signatures, then check the Enable Signature to configure this user to apply electronic signatures. By default, the Signature Name is set to the Login Name.
For added security, eSignatures use a 2-step authentication. The first is the Login Name and Password and the second is the Pin Code which will be needed when the User applies the signature.
Each user is assigned a Role as Review, Accept, Approve or All which is used when eSignatures are added to the template. A report can support a combination of four roles.
Note that a user can be assigned for All roles.
Add eSignatures to a Template
From the Project Explorer, under the Template Design tab and choose Studio. Open a template in the studio and select File, Settings.
The display shows the groups that can access the report template when it is used on-demand and also the signatures roles that are required when eSignatures are applied to the report.
 |
In the above example, two users will be required to complete the eSignature process; one user with Review role and one user with Approve role.
Produce a Report with eSignatures
Scheduling a template that is configured with eSignatures will automatically produce a report requiring eSignatures.
If the report is modified by the scheduler, then any existing signatures will be removed since the signatures were not applied on the completed report. As an example, a report updated periodically over the production of a batch should only be signed when the batch report is complete.
eSignatures Banner
Signatures are assigned to reports in the workbook viewer. From the Project Explorer, under the Report section, choose Workbook Reports. A similar navigation is from a Team client running on a desktop.
Signature Banner
The signature banner will appear in the viewer if the report being viewed requires eSignatures. Indicating it was generated from a template configured for signatures.
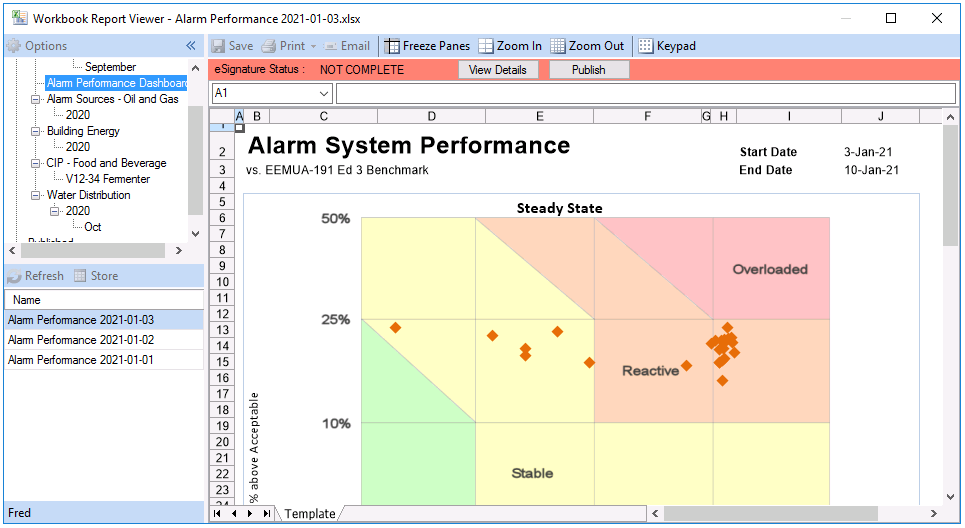 |
The banner states are:
Not Visible The report does not require eSignatures
Red eSignatures have not been entered
Yellow eSignatures are partially entered
Green eSignatures are complete
Add eSignatures to a Report
From the banner, click View Details.
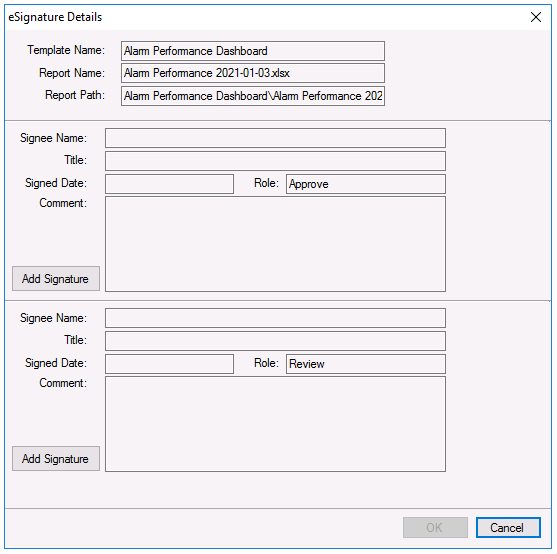 |
The dialog shows the signatures and any that have already been specified. In the above, the report requires signatures from two Users that have Approve and Review roles.
Click Add Signature.
 |
If the active user has the Role indicated, then the Login Name and Password is pre-filled and only the Pin Code will be needed. If the active user does not have the Role indicated then all the fields are required.
 |
Publish Report with Signatures
At any time, the report can be published with a signature certificate to a PDF file.
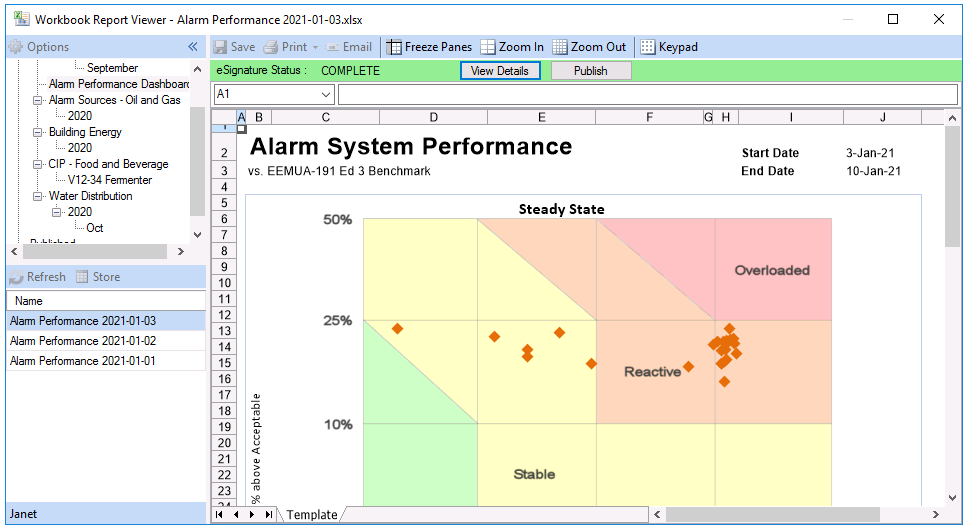 |
Click Publish Report. This action will save the workbook and signature certificate to PDF in the directory configured in the project on the server machine when selected from the Workbook Report Viewer on either the server or the Distributed Client.
Customizing the Signature Certificate
The signature certificate can be edited to suit. The template for the certificate is called certificate.xlsx as in located in the _library folder of the installation.
Note that the template contains a named cell called certificate_data which, by default, is location $B$39. The certificate data is written to the named cell as a single row.