Set up OPC HDA Server
OPC HDA Tuning for Automation
The first time XLReporter accesses data from the PI Historian, a popup window will appear. This behavior will prevent any report scheduling and so it must be suppressed by launching the server with a specific Windows Account.
Locate the PI OPC HDA Server service, right-click and select Stop.
Right click again and select Properties.
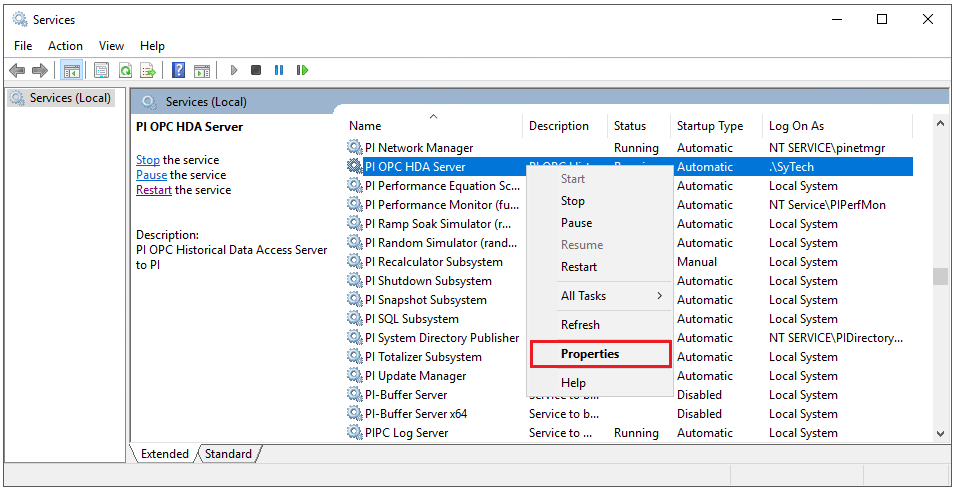
Go to the Log on tab, select This Account and specify an account.
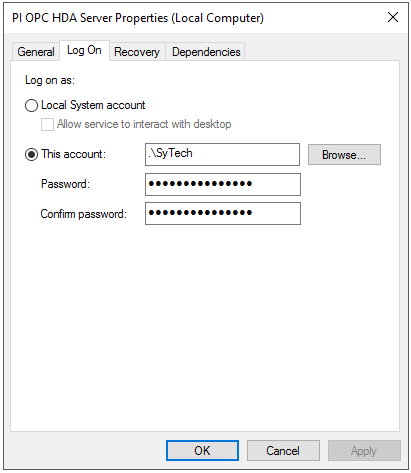
Configure the server itself to launch with the same account by updating DCOM settings. To access DCOM settings, for a 32-bit operating system, select Start, Run, and enter dcomcnfg. For a 64-bit operating system enter comexp.msc /32.
Expand Component Services, Computers, My Computer, DCOM Config.
Select PI OSI HDA Server right-click and select Properties
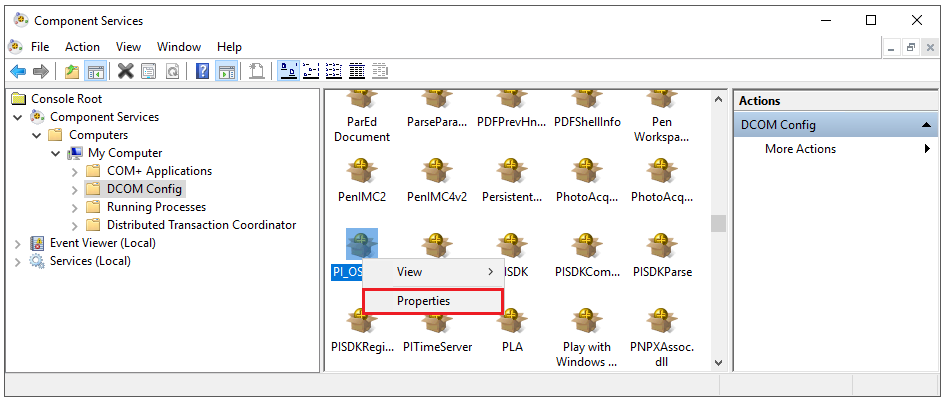
Select the Security tab
Set Launch and Activation Permissions to Customize
Click the Edit button.
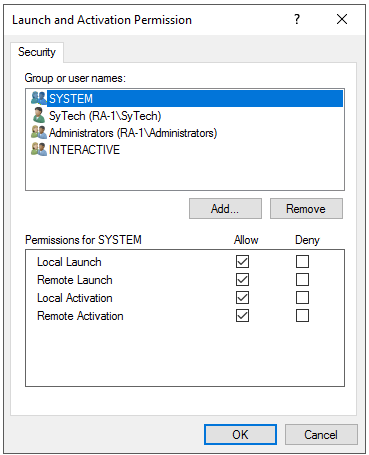
In Launch and Activation Permission, click Add.
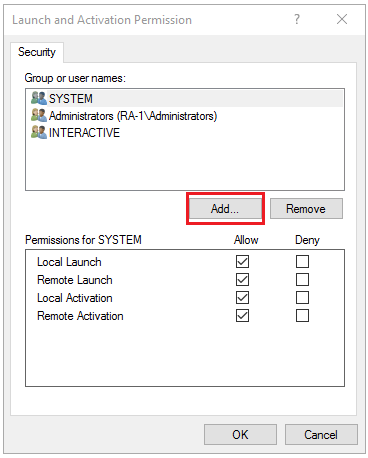
Add the current user, and/or any users associated with XLReporter design and runtime components.
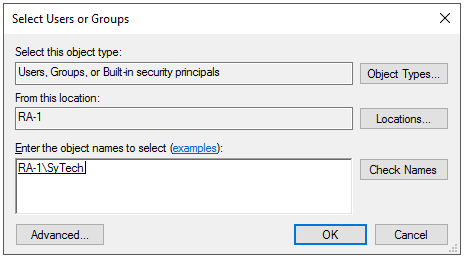
If XLReporter’s Scheduler is set to run as a Windows Service, you must also add the Windows user the Scheduler Service is running. All other Groups or Users should be removed.
To access data remotely with XLReporter Ultimate Edition, the ASPNET user should also be listed. If you experience issues retrieving the data from a team client, also add the user group EVERYONE to the list.
If XLReporter is installed locally, enable Local Launch and Local Activation. For installations where XLReporter and PI Historian are installed on separate machines, enable the Remote settings.
Under the Identity tab,
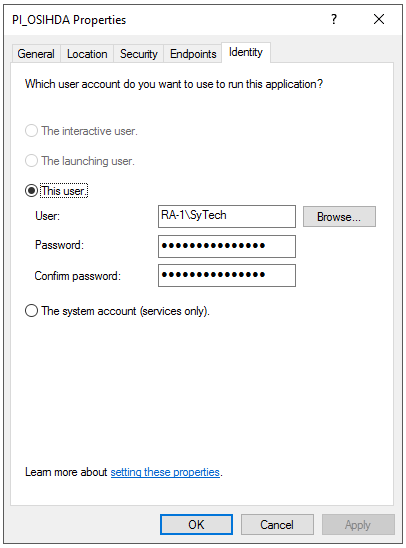
Set the account to This user and specify the same user account configured for the Windows Service to run under.
Restart the PI OPC HDA Server Windows service.