Scheduler Setup
The scheduler can be setup to run on the desktop, in the background or as a windows service.
From the menu option, select Scheduler, Setup.
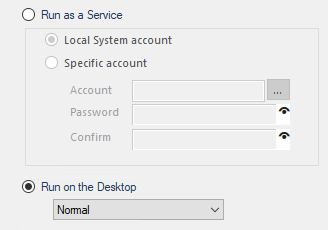 |
Run as a Service
Select this to run the Scheduler as a Windows Service. As a service, the Scheduler is automatically started by the operating system. This can be run using the Local System account or a Specific Account. The Local System account is suitable for most cases. However, if the action requires specific rights e.g., running a workbook macro or moving the workbook to a protected file server, then select Specific Account and specify an Account that has the appropriate rights. A browse button (…) is provided to help set the Account name.
The Scheduler service can also be set from Services inside the Windows Control Panel, Administrative Tools.
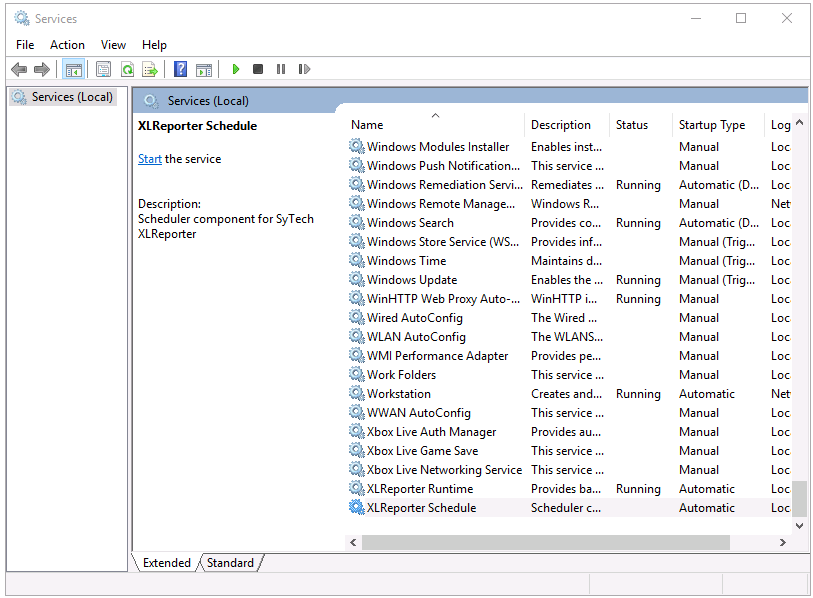 |
Navigate to the XLReporter Schedule service and right-click, select Properties.
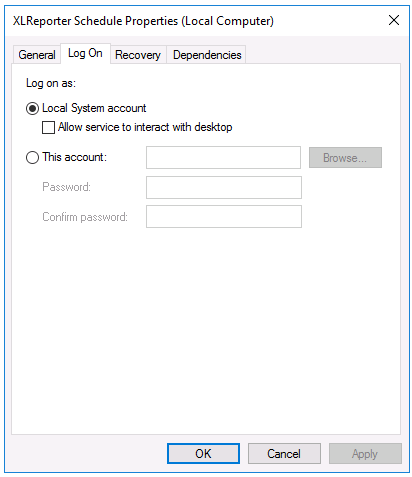 |
Under the Log On tab, select This Account. Use the Browse button to select the account name. Once selected, enter the Password and confirm it. Click Apply at the bottom to retain this change. When the service is started it will run under the new account.
A specific Account should be an Administrator and have a Password.
Run on the Desktop
Select this option to run the Scheduler on the desktop. The startup can be Normal, Minimized on the taskbar or Background with no icon on the taskbar.
A benefit of running Normal on the desktop is that the progress of the schedule is visible providing valuable insight during development.
Use this option only in special cases when the Scheduler cannot run as a service due to the limitations of the Connectors.
Automatic Startup
When running on the desktop, to start the Scheduler automatically, add a shortcut for the Scheduler to the Windows Startup folder. The easiest way to do so is to drag the Scheduler Engine item in the XLReporter program group (Start Menu, Programs, XLReporter) to the Windows Startup folder.
Stopping the Scheduler
When the scheduler is running, it can be stopped in the Schedule Designer from the Scheduler menu option or from the Project Explorer by unchecking the Scheduler running checkbox on the right.
Diagnostics
If the Scheduler is set to run on the desktop visible, the font color of the schedule line indicates the current state of the action.
Color | State |
|---|---|
Grey | The schedule line is enabled but not currently executed. |
Red | The schedule line is not enabled. |
Blue | The schedule line is currently being executed. |
Brown | There is an error reading the event trigger tag for the schedule line. |
The leftmost column in the Scheduler indicates the last time the schedule line was triggered to execute.
Event Trigger Tag
If there is an issue either with either a connector or trigger tag in the Scheduler, the Status Log is updated to indicate an error has occurred. In addition, once the error is resolved and data can be read again, the Status Log is again updated to indicate the tag is back in a good state.